
Hostinger Login Guide: Sign In, Reset Password, and Register
Hostinger Login: A Step-by-Step Guide for Beginners (2026)
Use the official Hostinger login page at auth.hostinger.com/login. This visual guide shows every click for signing in, resetting a password, recovering an account, and creating a new Hostinger account.
The screenshots below were captured from Hostinger's live pages on September 3, 2026. The guide stops before submitting a registration or purchasing a plan.
Hostinger login, step by step
Step 1: Open the official Hostinger login page
Go to https://auth.hostinger.com/login. Before entering any details, check that the address bar ends in hostinger.com.
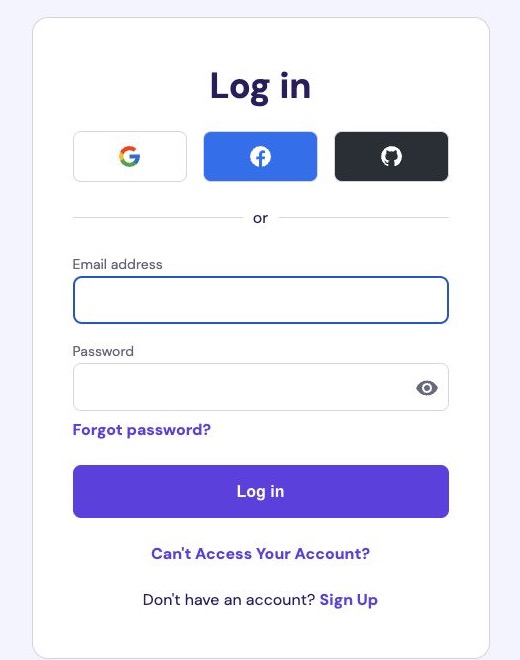
You should see: a Log in heading, social sign-in buttons, email and password fields, and a purple Log in button.
Step 2: Choose the same login method you used before
Select Google, Facebook, or GitHub if that is how you originally created the account. If you registered with an email address, continue to Step 3.
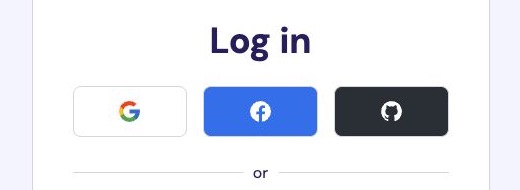
Beginner tip: choosing Google does not mean entering your Google password into Hostinger. Hostinger sends you to Google's own sign-in page.
Step 3: Enter your Hostinger email address and password
Type the email address connected to the account in Email address, then enter the account password in Password. Use the eye icon to check the password only when nobody else can see your screen.
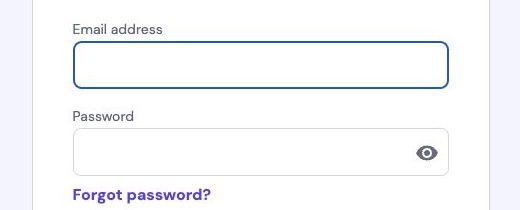
Step 4: Select Log in
Check the email address once more, then select Log in. Complete any security or two-factor-authentication prompt that Hostinger shows next.
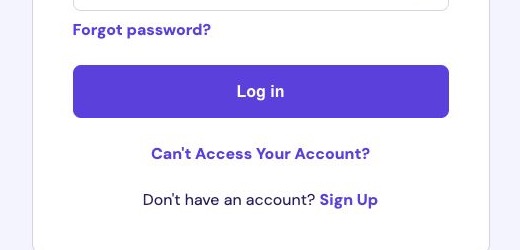
If you cannot continue:
- Select Forgot password? when you still have access to your account email.
- Select Can't Access Your Account? when you lost two-factor authentication, lost access to the email, or forgot the account email.
- Select Sign Up only if you need a new account.
Reset a forgotten Hostinger password
Step 5: Open the Reset password form
Return to the login page and select Forgot password?. Enter the email address connected to your Hostinger account, then select Send Reset Email.
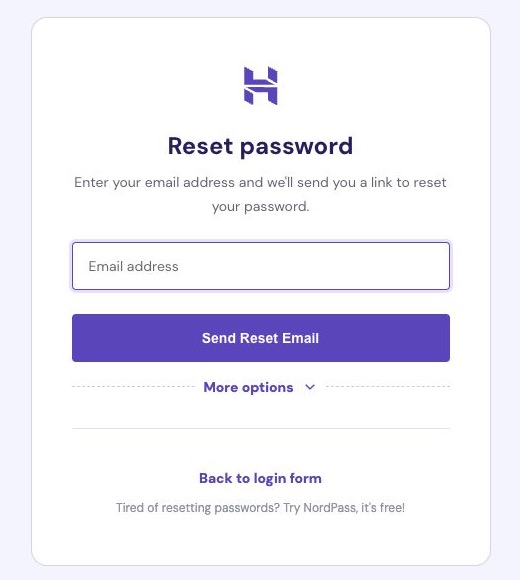
Open only a reset email that you requested yourself. Check that its link leads to a Hostinger-owned domain.
Step 6: Use the recovery-email option if needed
Select More options to reveal Use a recovery email instead. Choose this only if you previously configured a recovery email and cannot use the normal inbox.
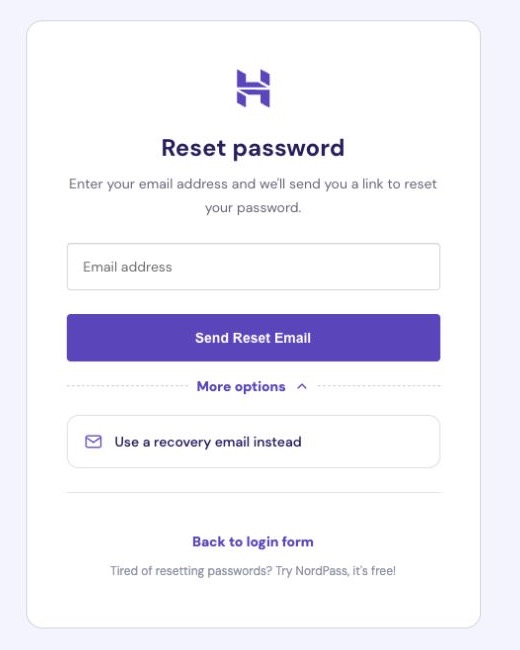
Recover a Hostinger account you cannot access
Step 7: Choose the reason you lost access
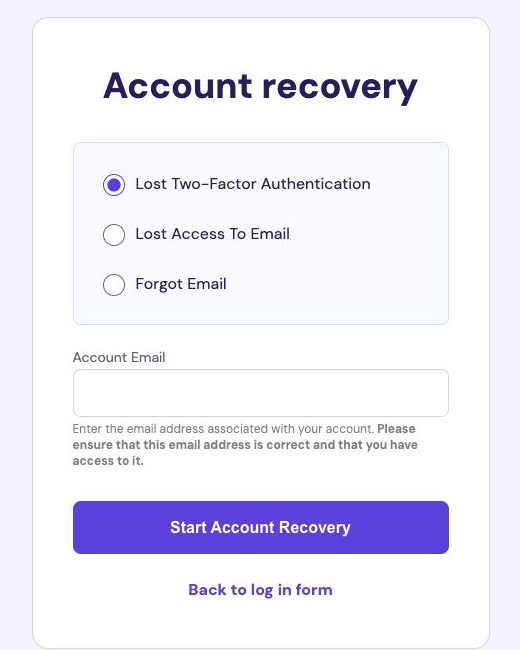
On the login page, select Can't Access Your Account?. Hostinger currently provides three recovery reasons:
- Lost Two-Factor Authentication
- Lost Access To Email
- Forgot Email
Select the matching reason, provide the requested account information, and select Start Account Recovery.
Do not send passwords, one-time codes, or identity documents to anyone claiming they can recover the account outside Hostinger's official process.
Create a new Hostinger account, step by step
Step 8: Open the registration page
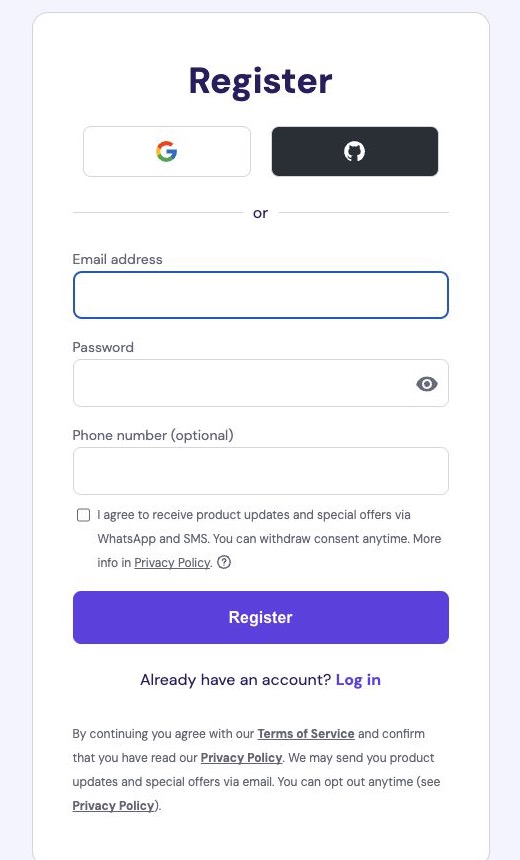
Select Sign Up below the login form, or go directly to https://auth.hostinger.com/register. Confirm that the page heading says Register.
Step 9: Choose social registration or email registration
Select Google or GitHub for a faster registration, or continue with an email address. Remember which method you choose—you should use the same method when logging in later.
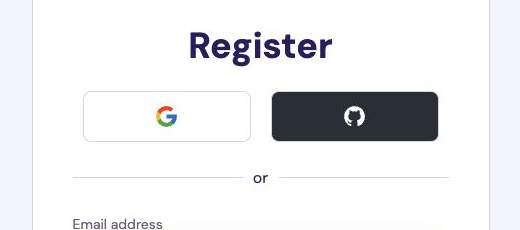
Step 10: Create your email and password credentials
Enter an email address you can access and create a unique password. Do not reuse the password from your email, bank, or another important account.
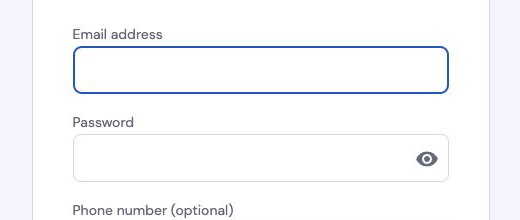
Step 11: Review the optional phone and marketing fields
The Phone number field is currently marked optional. The WhatsApp and SMS checkbox is also optional; leave it unchecked if you do not want promotional messages.
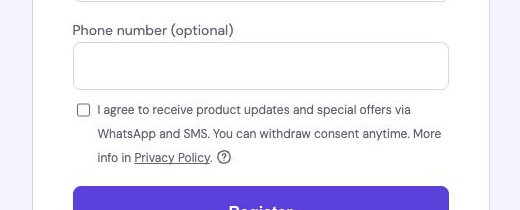
Step 12: Review the terms, then select Register
Read Hostinger's Terms of Service and Privacy Policy. When your details are correct, select Register.
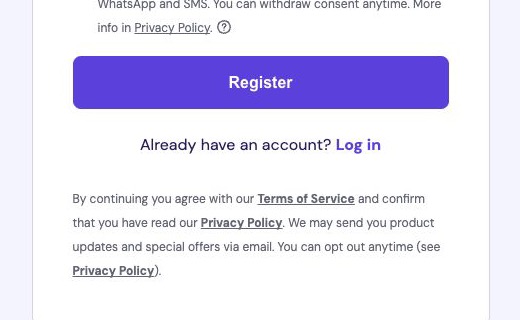
This creates an account; it does not by itself purchase hosting. Before any later payment, check the plan, billing period, introductory price, renewal price, taxes, and final total.
Hostinger login troubleshooting checklist
If the Hostinger login page keeps returning or does not accept your details, try these checks in order:
- Confirm you are using the original login method: Google, Facebook, GitHub, or email and password.
- Check for typing mistakes and unwanted spaces in the email field.
- Allow cookies for Hostinger, then reload the page.
- Try the login page in a private browser window.
- Temporarily disable extensions that block scripts or modify login pages.
- Use Forgot password? or Can't Access Your Account? instead of repeatedly guessing.
Frequently asked questions
What is the official Hostinger login URL?
The official Hostinger login URL is https://auth.hostinger.com/login.
Can I log in to Hostinger with Google or GitHub?
Yes. The live login page currently supports Google, Facebook, GitHub, and email/password login.
Is a phone number required to create a Hostinger account?
The registration page marked the phone-number field as optional when this guide was checked. Hostinger may request additional information later for verification or payment.
Does registering automatically buy a hosting plan?
No. Registration creates the account. Buying hosting is a separate transaction with its own checkout and payment confirmation.
Sources
Latest from the blog
New research, comparisons, and workflow tips from the Vibe Coding Tools team.
A recorded Muse signup through Airtap, covering email codes, birthday confirmation, Meta account creation, and the limits of the invite-code and chat checks.
A practical look at local LLMs and agent workflows on a 32GB Apple Silicon Mac mini, including Qwen3.6-35B-A3B, MLX, and tool-calling limits.
A practical review of Jev's typed decisions, state handling, current AI Gateway availability, and independent open source alternatives.