
How to Apply for Google AdSense and Get Your Site Reviewed
How to Apply for Google AdSense and Get Your Site Reviewed
An AdSense application succeeds or fails on more than the form. Google must be able to reach the site, confirm that you control it, review the site against its policies, and finish any required account checks.
This walkthrough is for a self-hosted website rather than YouTube, Blogger, or another hosted partner. The screenshots use a Chinese-language account, but the workflow is the same. Domains, profile details, and publisher IDs have been replaced.
The five things worth checking before you apply
Open the site in a private browser window and confirm that:
- A visitor can reach it without signing in.
- The home page, navigation, representative articles, About, Contact, privacy policy, and terms pages work.
- The site contains original, useful material rather than an unfinished theme or placeholder pages.
- HTTPS works and
robots.txtdoes not block the important pages. - The Google Account you plan to use is not tied to a duplicate AdSense account.
There is no useful shortcut around these checks. Verification proves control of a domain; it does not prove that the site is ready for ads.
A clean order of operations
Create the AdSense account
        ↓
Finish every required task shown on the account home page
        ↓
Add the root domain
        ↓
Publish one supported ownership-verification method
        ↓
Verify the live page yourself
        ↓
Request a site review
        ↓
Configure an appropriate CMP for regulated traffic
        ↓
Monitor the site status and act on the actual result
Create the account with payment reality in mind
Start at Google AdSense, sign in, and enter your website if the signup flow asks for it. You can also select the option to add a site later when that choice is available.
The payment country or territory should be where you currently live and can receive a mailed PIN. It is not a targeting preference, and AdSense does not normally let you change it later. Choose whether to receive optimization messages, accept the terms, and finish creating the account.
Let the home page tell you what is required
New accounts commonly show cards for payment information, ad previews, and connecting a site.
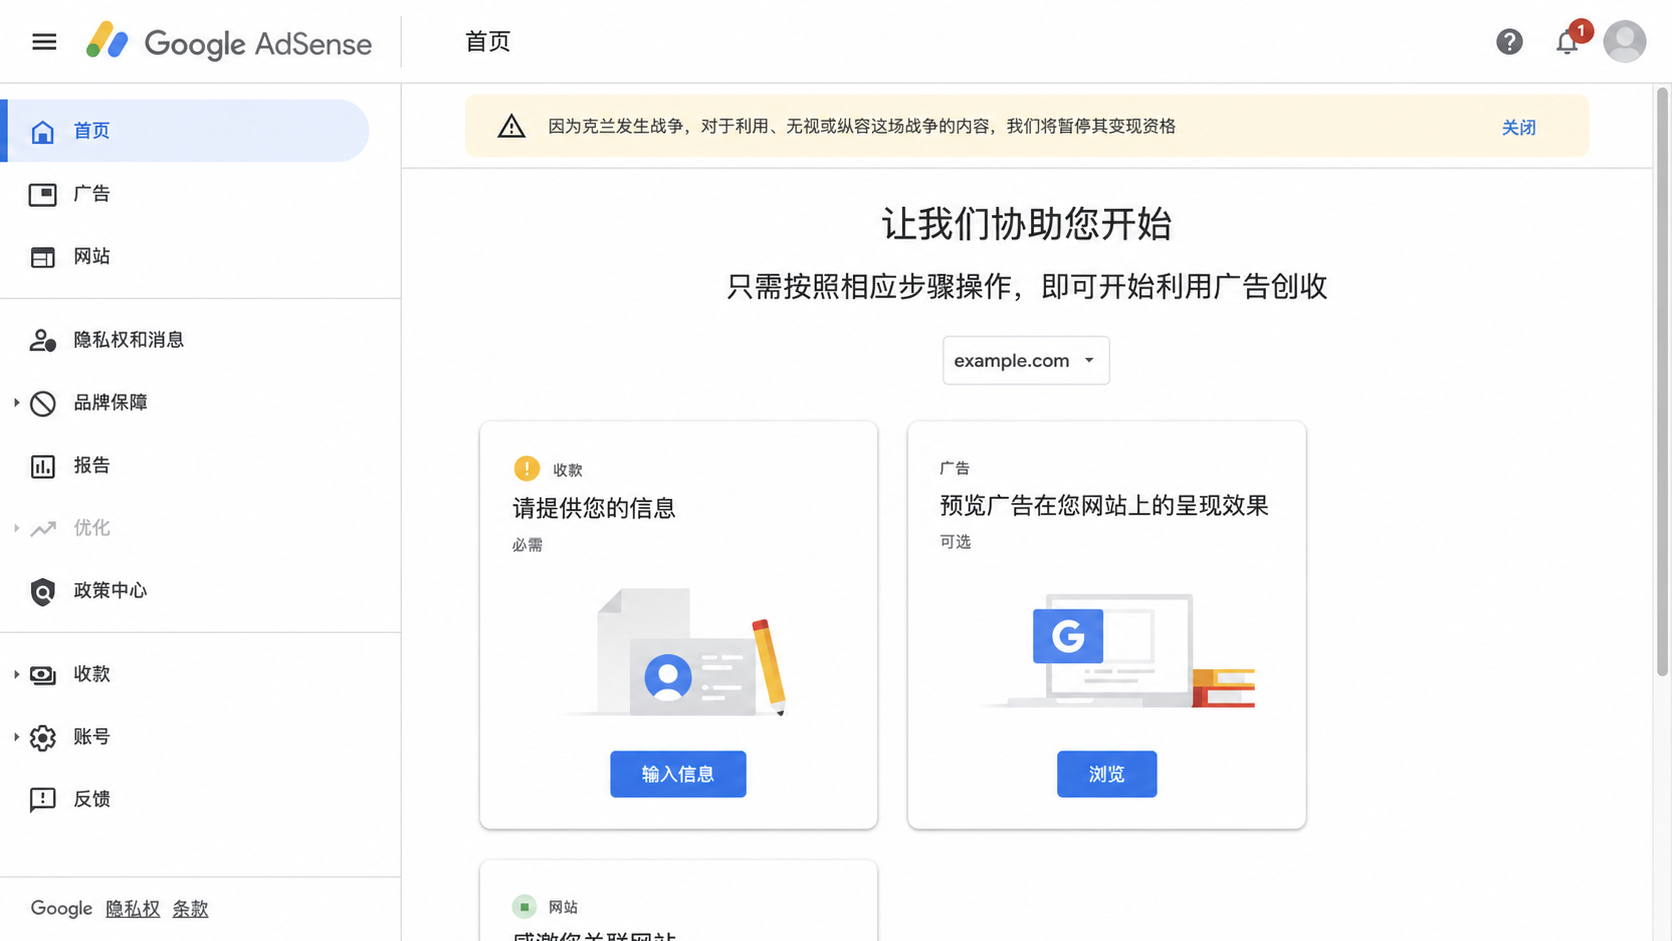
Treat the cards marked as required as a live checklist. In some accounts, the site review will not start until payment information has been submitted. That makes “I will add payment details after approval” unreliable advice: complete whatever your own dashboard currently requires.
Add the site once, using its root domain
Open Sites, choose Add site, and enter a root domain such as example.com.
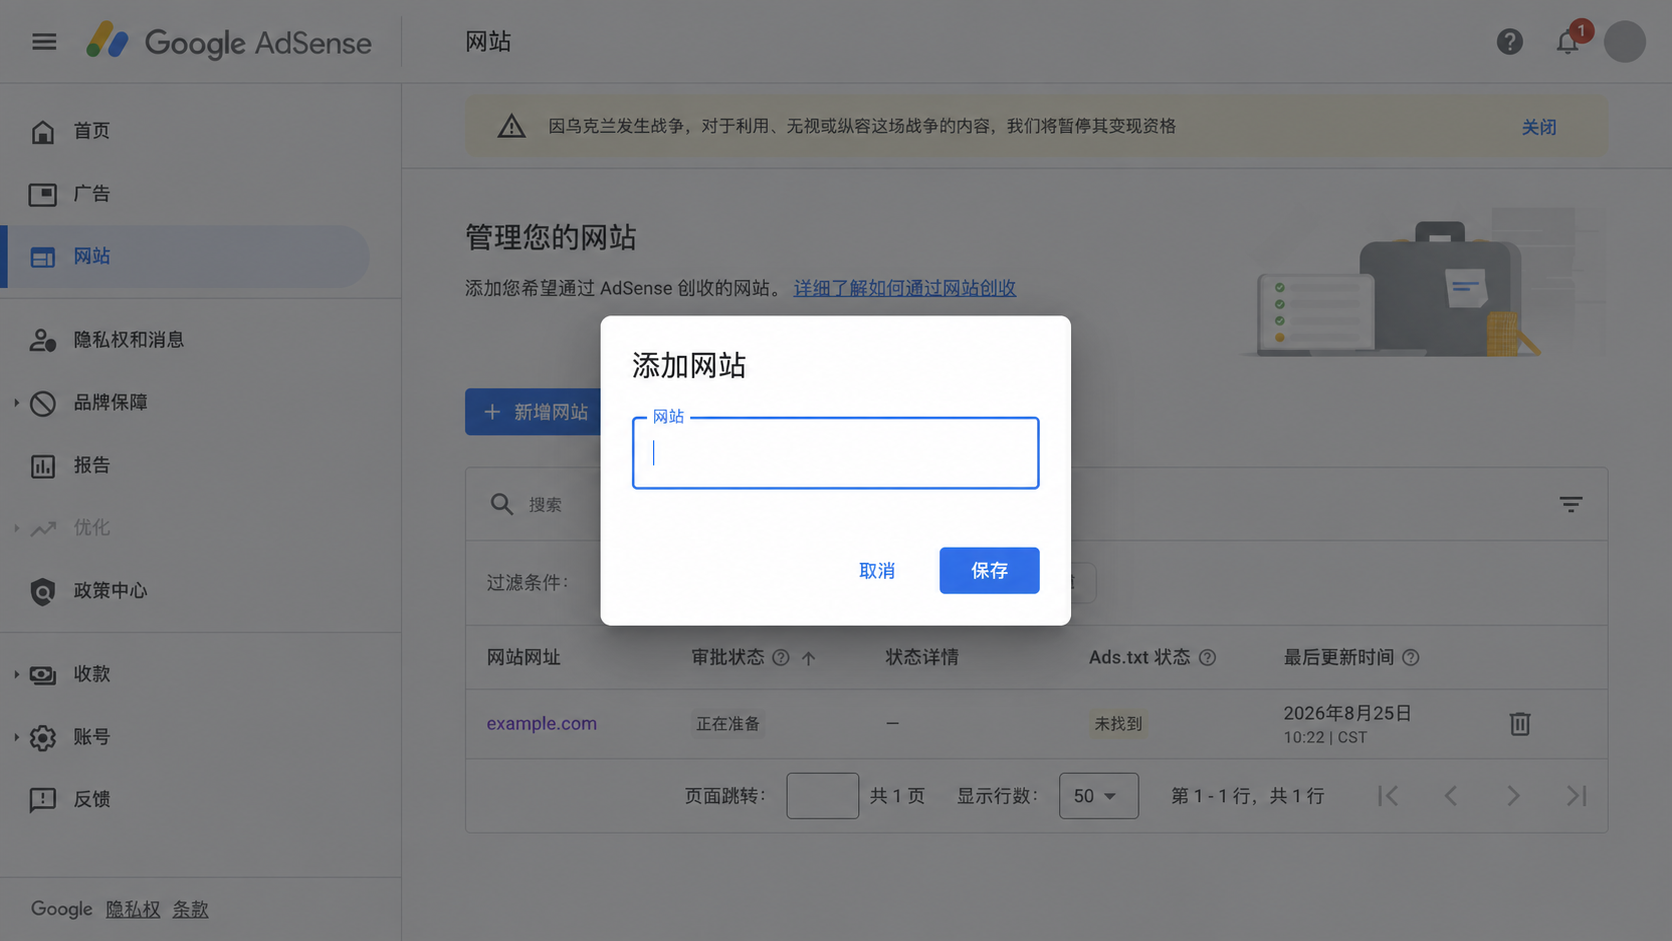
Do not submit an individual article URL, an admin URL, or a campaign link with query parameters. If the correct domain is already listed, open it instead of creating a duplicate.
Use a meta tag when you want the least intrusive verification
AdSense may offer an ad code snippet, an ads.txt snippet, or a meta tag. A meta tag is often the smallest change because it does not display an ad.
Choose the meta-tag method and copy the entire value from your own account.
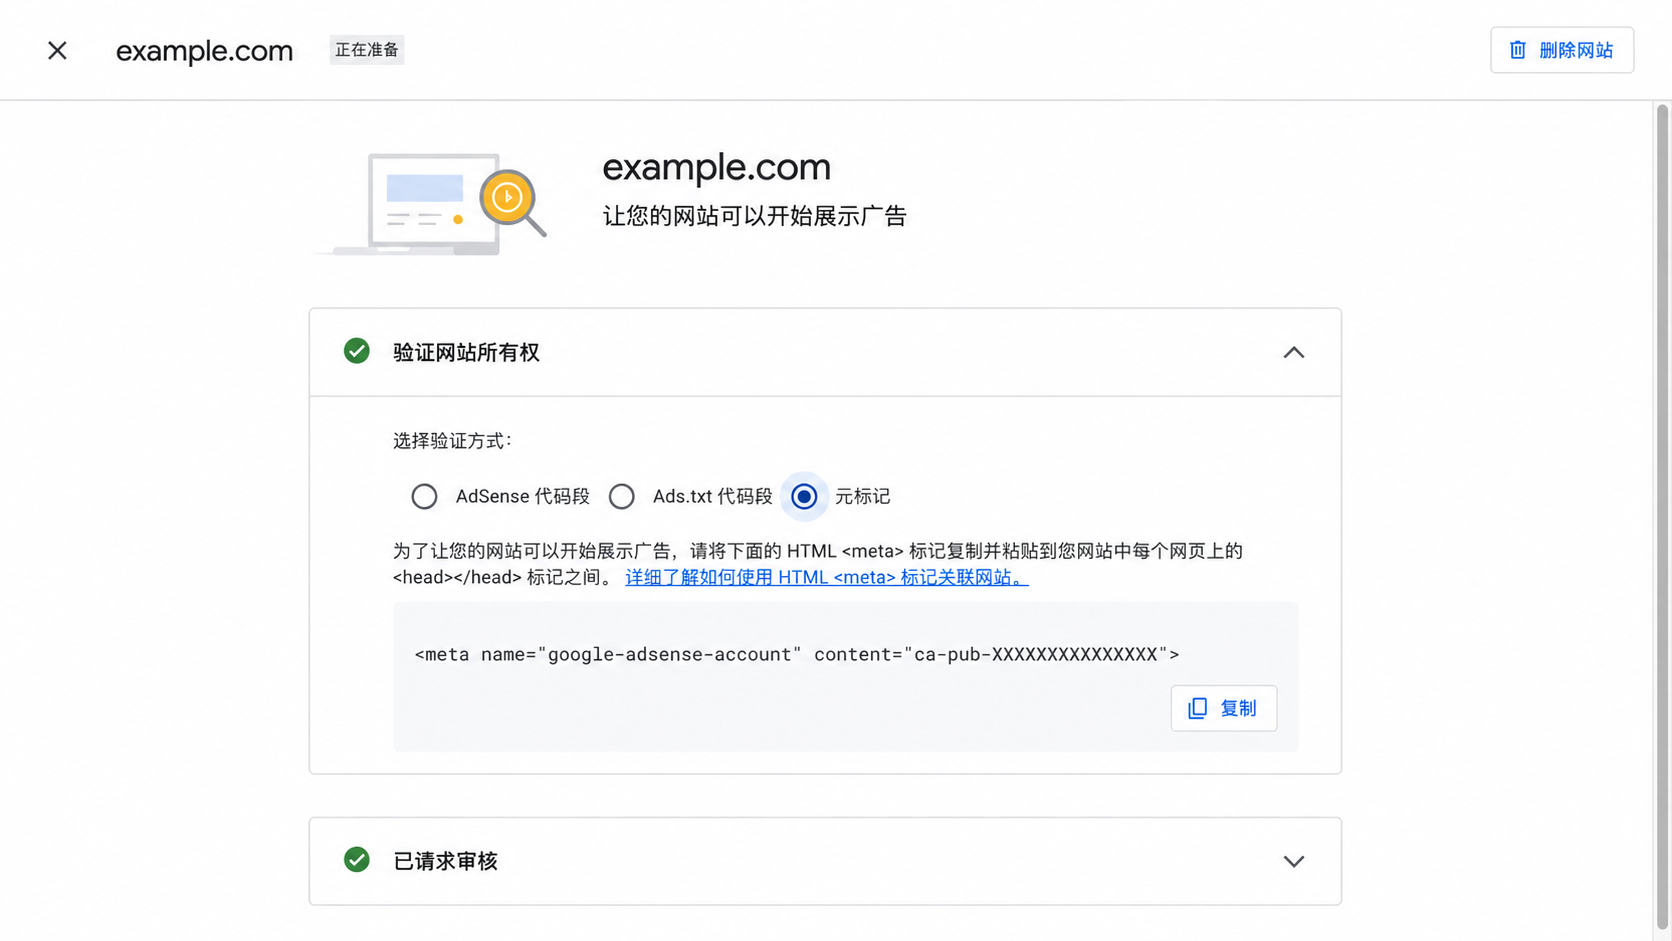
It will resemble this:
<meta name="google-adsense-account" content="ca-pub-XXXXXXXXXXXXXXXX">
Add it to the global <head> so that it appears on the public home page. In a static site, use the shared head template. In Next.js, Nuxt, or Astro, use the root layout or global metadata configuration. In WordPress, prefer a stable theme setting or a trusted header-insertion feature.
After deployment, test the live site before pressing Verify:
curl -fsS https://example.com | grep google-adsense-account
The result must contain your real publisher value, not the placeholder above. A browser's View Source command works as well.
If Search Console ownership is already available, AdSense may be able to continue checking through that route. Whichever method you use, keep it available while the application is being reviewed.
Publish ads.txt while you are here
ads.txt is a public declaration of authorized inventory sellers, not an API key. Google describes it as optional but strongly recommended.
Copy the line provided by your AdSense account. Its shape is:
google.com, pub-XXXXXXXXXXXXXXXX, DIRECT, f08c47fec0942fa0
Publish it as plain text at:
https://example.com/ads.txt
Opening that URL should return HTTP 200 and show the line. The AdSense status can lag behind deployment by days, and a low-volume site may take longer to be recrawled. Do not expose payment or identity details in this file; only the publisher line supplied by AdSense belongs there.
Request the review only after the live checks pass
Return to the site details, confirm that ownership has been verified and that the account home page has no blocking setup task, then choose Next and Request review.
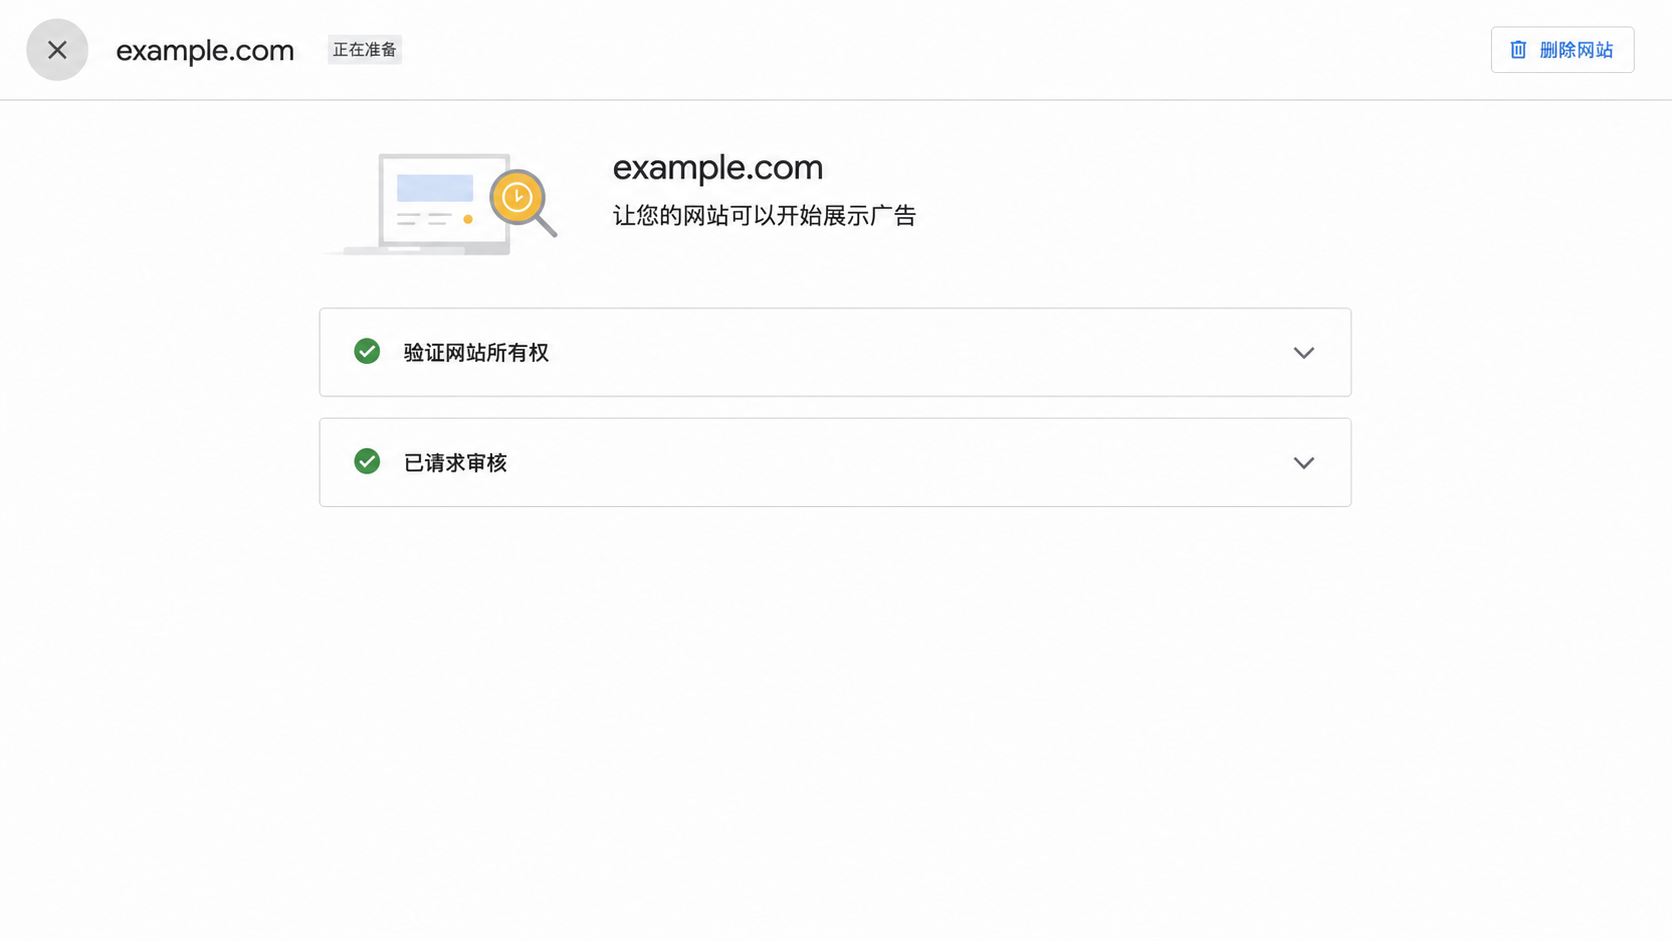
“Getting ready” means the checks are running; it is not approval. Google says reviews usually take a few days and can take 2–4 weeks in some cases. Removing and resubmitting the site can delay the process.
Handle consent as a separate compliance job
After requesting a review, AdSense may offer Google's consent management platform. You may use it or a suitable certified third-party CMP.
Google's three-button message gives visitors clear choices to consent, decline, or manage options. You can later edit the selected sites, languages, privacy policy URL, and presentation from Privacy & messaging under the European regulations message.
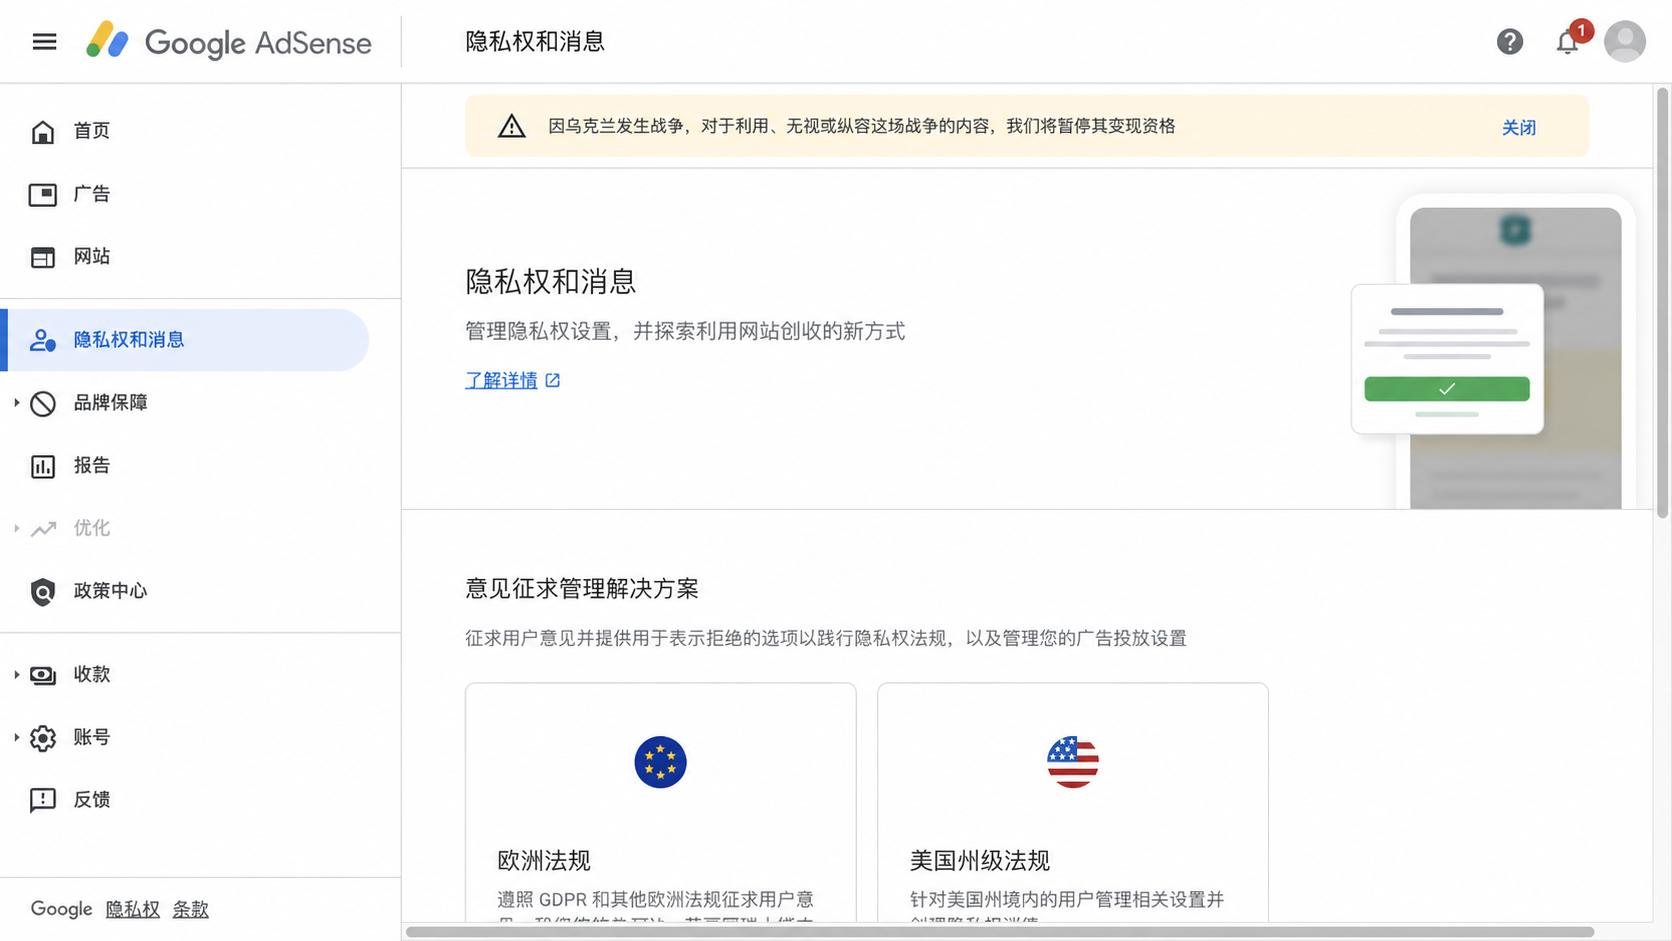
For ads served to users in the EEA, the UK, or Switzerland, Google requires an appropriate certified CMP integrated with the IAB Transparency and Consent Framework. Publishing a consent message does not mean the site passed its AdSense review, and it does not replace your own legal assessment.
Enter payment information exactly, not approximately
When the dashboard asks for payment details:
- Individuals should use the full name shown on their banking information.
- Organizations should use the legal organization name and the requested contact details.
- The postal address must be complete and able to receive ordinary mail and the later PIN letter.
- If phone verification is requested, its country code must match the country or territory selected at signup.
Names, postal addresses, identity documents, bank details, phone numbers, and PINs should never appear in tutorial screenshots, issue reports, chat logs, or a source repository.
What to do while the status is “Getting ready”
Keep the site boringly stable:
- leave the verification method and
ads.txtonline; - keep the important pages public and crawlable;
- continue publishing normal content without redesigning the entire site mid-review;
- monitor the email attached to AdSense and the status under Sites;
- never click your own ads or manufacture traffic;
- do not delete and re-add the domain to try to restart the queue.
Read the result before changing the site
Ready
The site is eligible to show ads. Complete any remaining account task, then configure Auto ads or individual ad units. Check both mobile and desktop layouts so ads do not cover navigation, content, or controls.
Needs attention or not ready
Open the site details and save the full rejection text. The useful categories are concrete: missing code, an unreachable site, insufficient original content or poor navigation, and policy violations.
Fix the stated cause, deploy, verify the production site, and only then request another review. Rewriting every page in response to a two-word label creates more risk than investigating the evidence first.
Official references
Latest from the blog
New research, comparisons, and workflow tips from the Vibe Coding Tools team.
A recorded Muse signup through Airtap, covering email codes, birthday confirmation, Meta account creation, and the limits of the invite-code and chat checks.
A practical look at local LLMs and agent workflows on a 32GB Apple Silicon Mac mini, including Qwen3.6-35B-A3B, MLX, and tool-calling limits.
A practical review of Jev's typed decisions, state handling, current AI Gateway availability, and independent open source alternatives.